
Set up single sign-on
Connect an OIDC or SAML 2.0 identity provider such as Okta or Microsoft Entra ID, verify your email domain with a DNS TXT record and require SSO for your worksp
Single sign-on (SSO) lets members sign in to Doxbrix through your company's identity provider (IdP) instead of a Doxbrix password. This guide shows you how to connect an OpenID Connect (OIDC) or SAML 2.0 provider, verify your email domain and, optionally, require SSO for everyone on that domain.
This page covers sign-in to the Doxbrix app for workspace members. To put a published documentation site behind sign-in for readers, see Make a site private.
How workspace SSO works
- You add a connection in Workspace settings → Single Sign-On. A connection pairs one IdP with one email domain, for example
example.com. - You register the Doxbrix callback URL with your IdP and paste the IdP's details into Doxbrix.
- You prove that your workspace owns the email domain by publishing a DNS TXT record.
- Members choose Continue with SSO on the sign-in page and enter their work email. Doxbrix sends them to the IdP whose domain matches.
- Optionally, you turn on Require SSO so that password sign-in is blocked for that domain.
If a pending email invitation exists for the address, the SSO sign-in accepts it and grants the invited role.
Before you begin
- Plan: SSO is available on the Business plan. See Plans and limits reference.
- Role: you must be a workspace owner or admin. Other roles see the error Only workspace owners and admins can manage SSO.
- IdP access: you need administrator access to your IdP to create an application.
- DNS access: you need to add a TXT record to the DNS zone of your email domain.
- Limit: a workspace can connect up to 10 identity providers.
Supported providers
| Protocol | Providers |
|---|---|
| OIDC | Okta, Google Workspace, Auth0, OneLogin, Microsoft Entra ID, Ping Identity, JumpCloud, Keycloak, Salesforce Identity, Oracle Identity, Generic OIDC |
| SAML 2.0 | Duo SSO, AWS IAM Identity Center, CyberArk Identity, AD FS, Shibboleth, Generic SAML 2.0 |
Choose Generic OIDC or Generic SAML 2.0 for any provider that is not listed.
Connect an identity provider
Open the Account menu at the bottom of the dashboard sidebar and select Workspace settings. In the settings navigation, select Single Sign-On.
Before any connection exists, the page reads No identity provider connected yet and shows the Connect identity provider button and the Require SSO toggle.
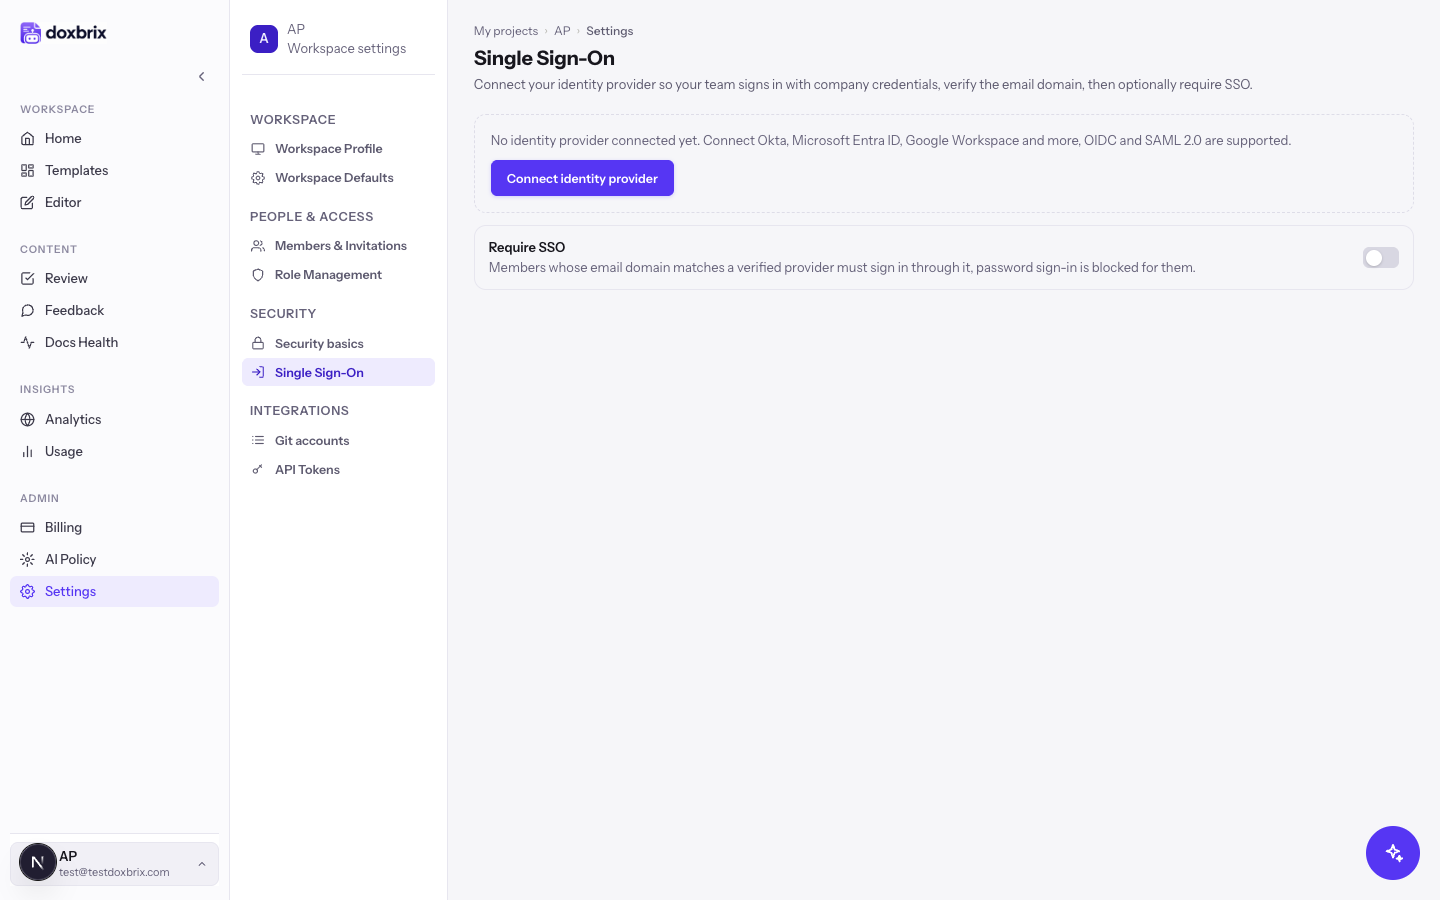
Select Connect identity provider. The Connect an identity provider panel lists every supported OIDC and SAML provider. Type in the search box to filter the list by name or protocol.
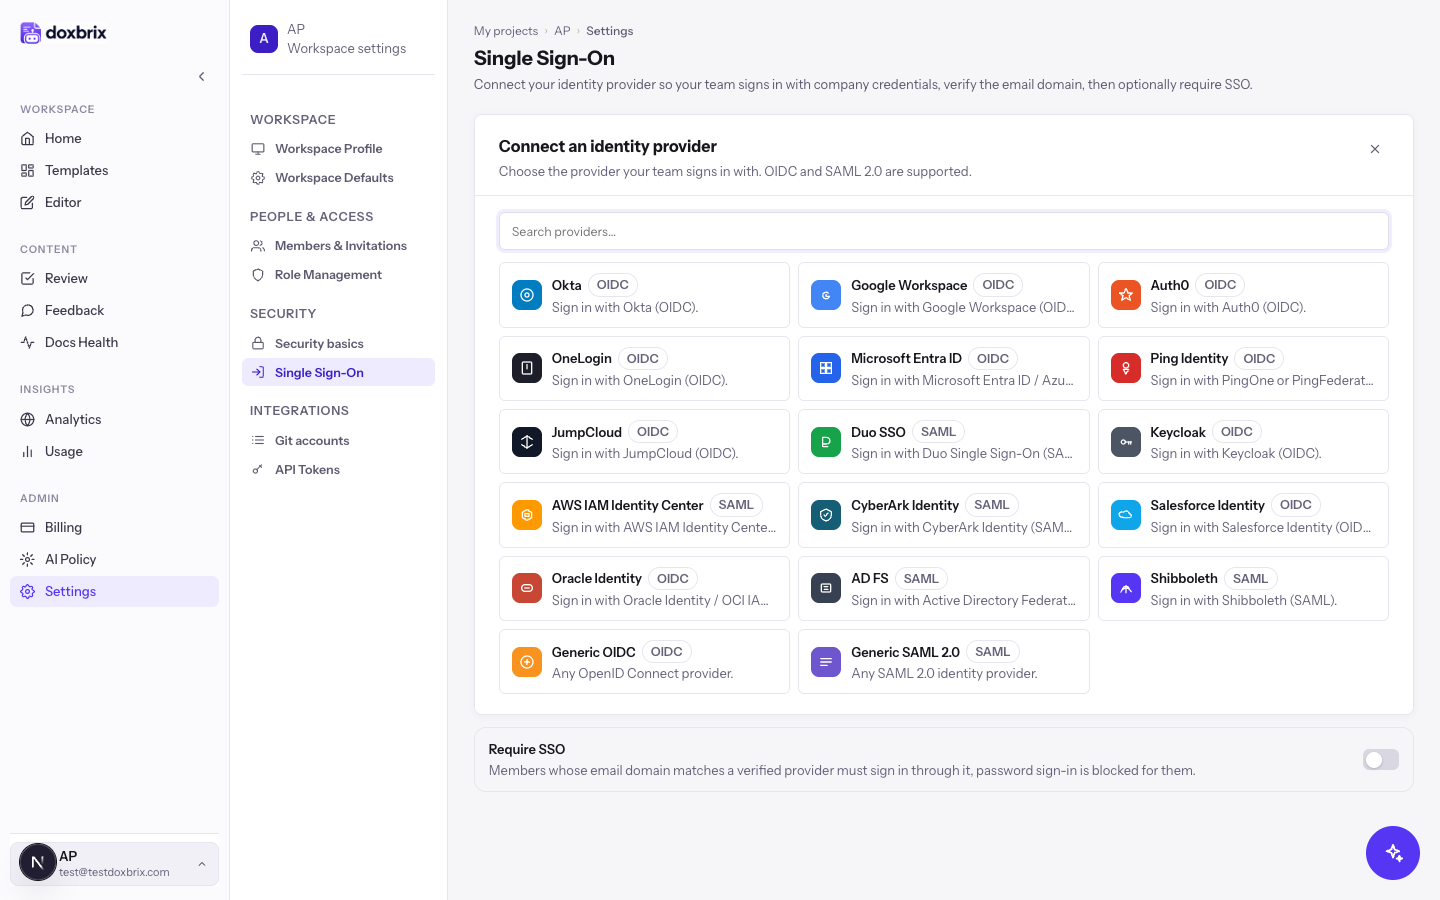
Select your provider. The form shows setup steps for that IdP and the URL to register with it:
- For OIDC, the Redirect / callback URL, which ends in
/api/auth/sso/callback. - For SAML, the ACS URL (assertion consumer service URL), which ends in
/api/auth/sso/saml2/sp/acs.
Select Copy and paste the URL into your IdP application. For Okta, create an OIDC - OpenID Connect app of type Web Application and paste the URL into Sign-in redirect URIs.
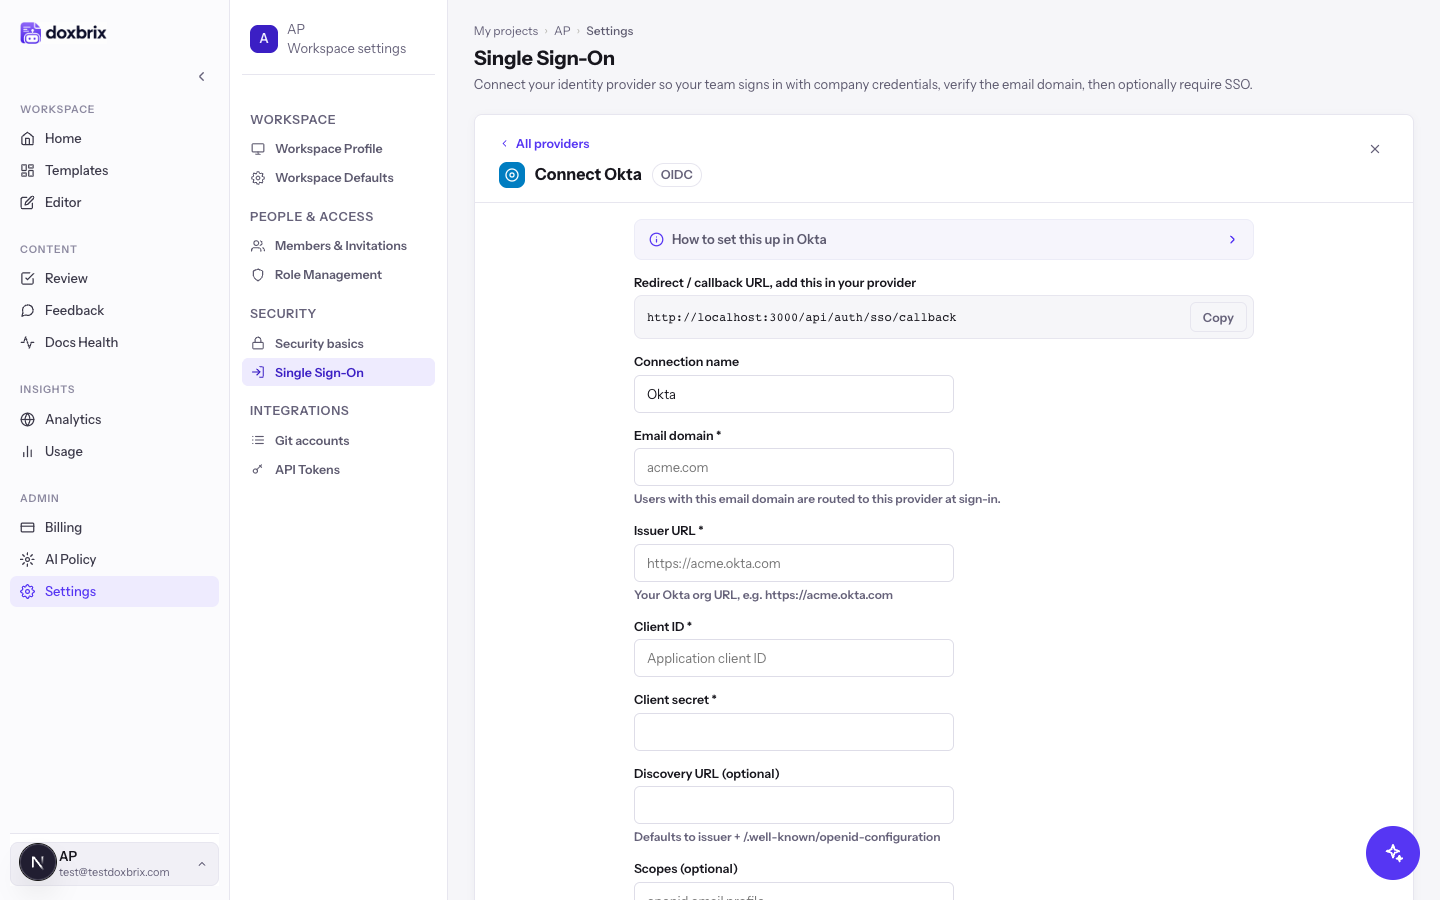
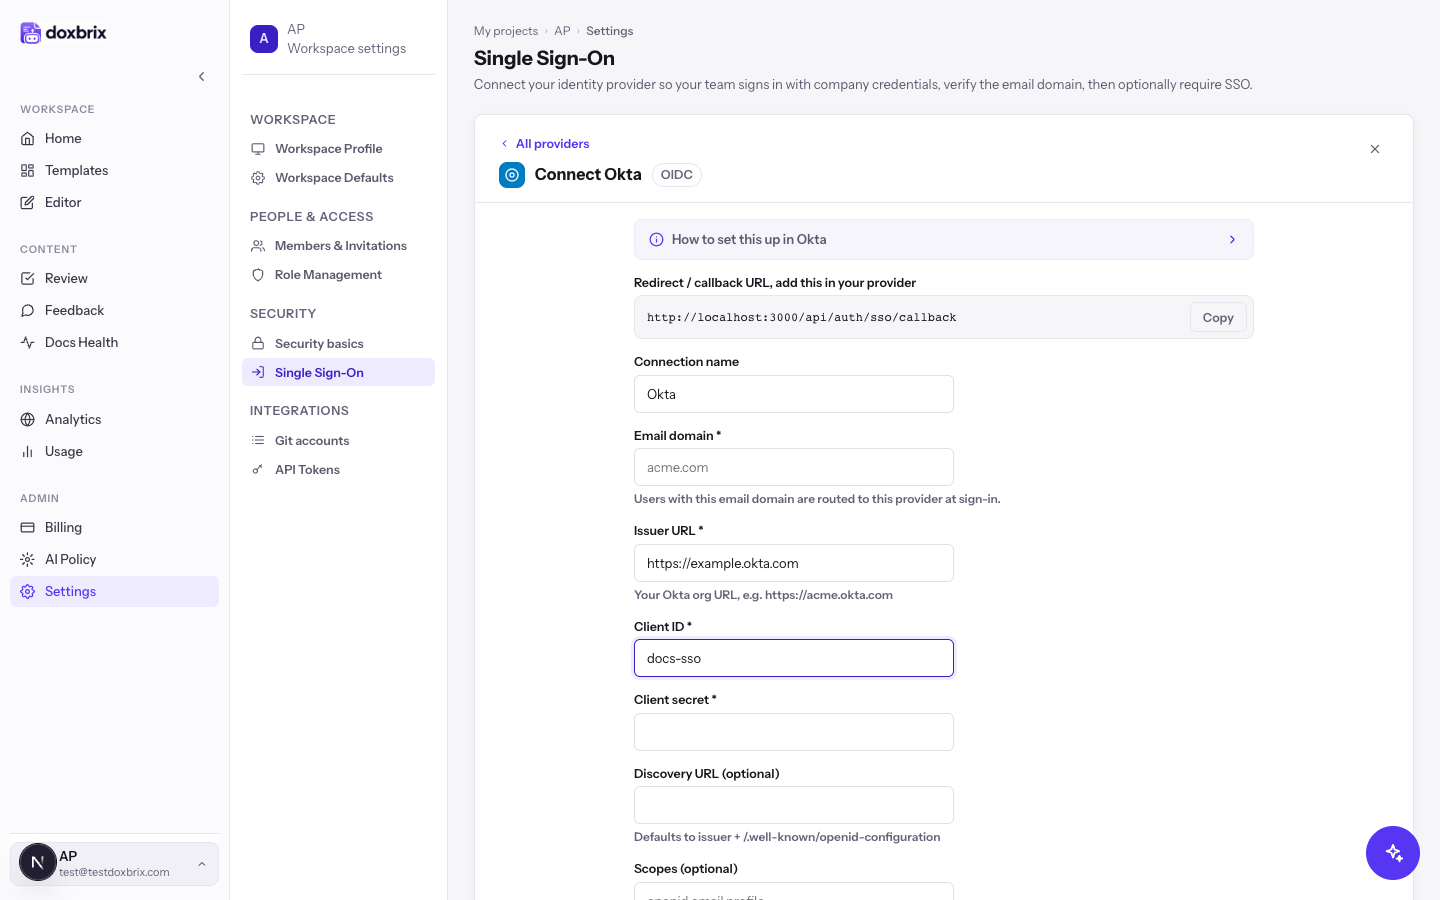
Fill in the form. For an OIDC provider such as Okta:
| Field | Example | Notes |
|---|---|---|
| Connection name | Example Okta | A label you recognize in the connection list |
| Email domain | example.com | Required. Members with this email domain use this IdP |
| Issuer URL | https://example.okta.com | Required. Your Okta org URL |
| Client ID | docs-sso | Required. From the IdP application |
| Client secret | Your client secret | Required. Stored encrypted |
| Discovery URL (optional) | Leave empty | Only if your IdP uses a non-standard discovery document |
| Scopes (optional) | Leave empty | Only if your IdP needs extra scopes |
For Google Workspace, use https://accounts.google.com as the Issuer URL.
For a SAML 2.0 provider, the form asks for IdP metadata URL or, if your provider only offers a download, IdP metadata XML. Email attribute (optional), Name attribute (optional) and Role attribute (optional) map custom attribute names from your IdP.
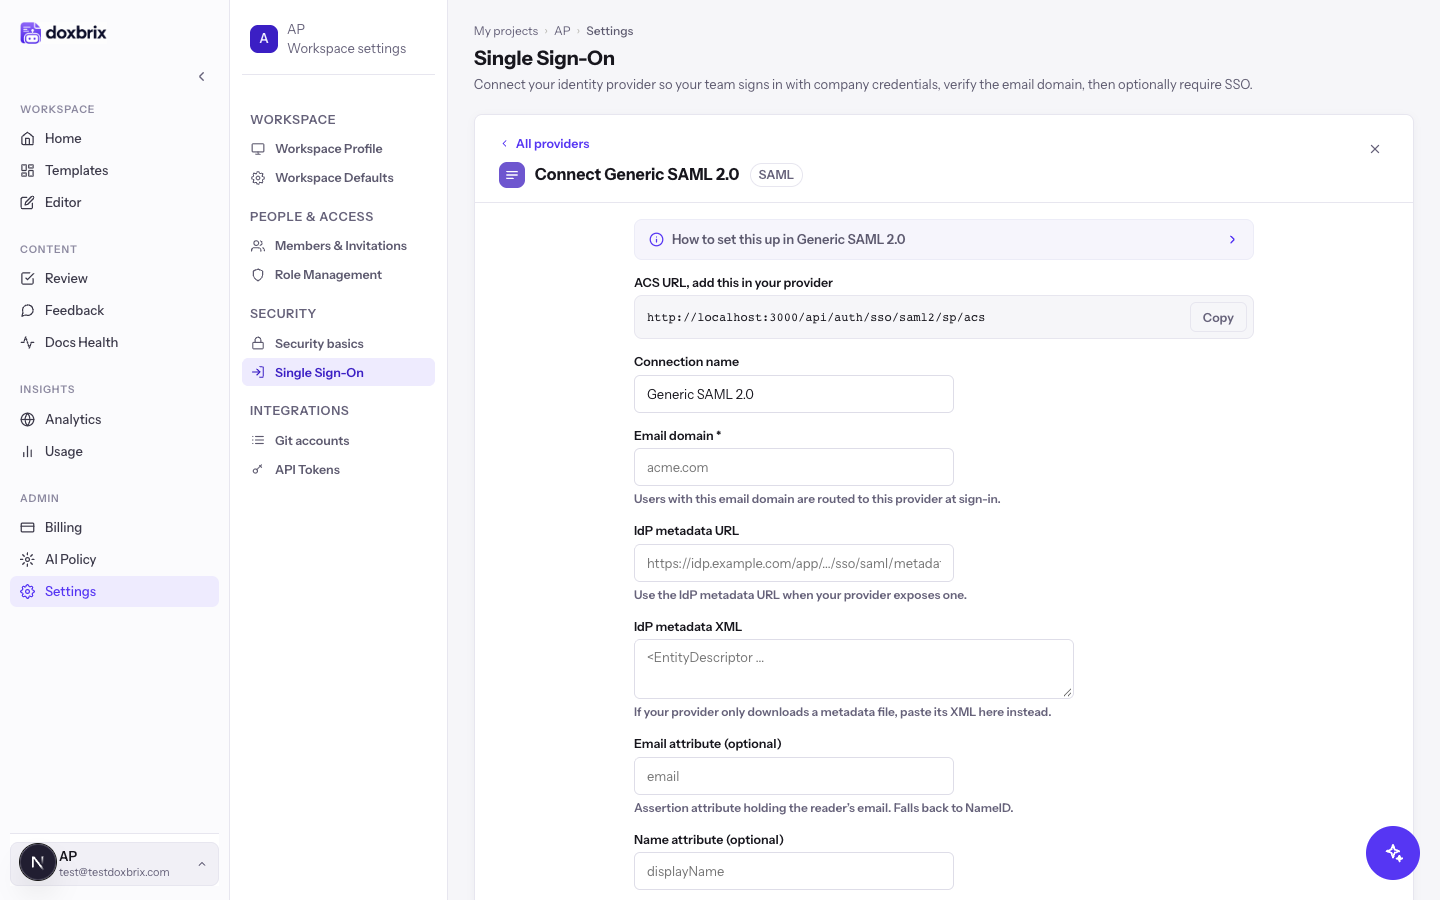
Select Test & connect. The button shows Testing connection… while Doxbrix checks the credentials. Credentials are encrypted at rest and verified before anything is stored.
When it succeeds, Doxbrix shows Identity provider connected. Verify the domain to activate SSO sign-in. The connection appears in the list with its protocol and a status such as Configured or Connected.
Verify your email domain
Domain verification proves that your workspace controls the email domain it claims, so no other workspace can route your users to its IdP. SSO sign-in stays inactive for a connection until its domain is verified.
In the connection list, select Get DNS record on your connection. Doxbrix shows a DNS TXT record box with a Host and a Value, and the notice Add the DNS TXT record shown below, then click "Check DNS".
The host has the form _docflow-sso-<provider-id>.example.com. Copy both values exactly as shown.
In your DNS provider, create a TXT record with the Host as its name and the Value as its content. DNS changes can take time to propagate.
Back in Doxbrix, select Check DNS. When Doxbrix finds the record, the connection shows Domain verified and the verification buttons disappear.
Require SSO
At the bottom of the Single Sign-On page, switch on Require SSO. Members whose email domain matches a verified provider must now sign in through it, and password sign-in is blocked for them.
Ask members to sign in with Continue with SSO and their work email. A member who tries a password on an enforced domain sees a message that the workspace requires single sign-on for this email domain and should use Continue with SSO instead.
Verify
- Open a private browser window and go to the Doxbrix sign-in page.
- Enter a work email on your domain, for example
teammate@example.com, and select Continue with SSO. The button shows Redirecting to your identity provider.... - Sign in at your IdP. You return to Doxbrix signed in.
To recheck a saved connection at any time, select Test on it in the connection list.
Manage connections
- Add another provider: select + Connect another provider. You can connect up to 10.
- Remove a connection: select Remove, then confirm with Remove when Doxbrix asks Remove this connection? If you remove the last verified connection, Doxbrix turns off Require SSO automatically so members can use passwords again.
Troubleshooting
For more sign-in and invitation problems, see Troubleshoot sign-in, invitations and SSO.